You’ve got water where it doesn’t belong, and now someone’s telling you the full restoration is going to take days or weeks. That’s a hard thing to sit with when you’re watching water-stained drywall and wet carpet. The process can feel like a black box, especially when you’re stressed and dealing with insurance calls at the same time. This breaks down exactly what happens, in order, and why each step is there.
Step one: the emergency call and arrival
The moment you call a restoration company, the clock starts. A reputable crew arrives with extraction equipment, moisture meters, and personal protective gear ready to go. At this stage, the job isn’t to start ripping things apart. It’s to get eyes on the situation quickly.
The first questions on arrival are about safety: is the source still active, is there any electrical risk, and what category is the water? Category 1 is clean water from a supply line or appliance. Category 2 is gray water, carrying some contamination, like a washing machine overflow. Category 3 is black water, which includes sewage or floodwater from outside. The category determines how aggressively materials need to be handled and what protective protocols go into effect. You can read more about what to prioritize in the first 24 hours before a crew arrives.
Step two: stopping the source and securing the space
Nothing else matters until the water stops moving. That might mean shutting off a supply valve, capping a broken pipe, or calling a plumber out alongside the restoration crew. In some San Diego homes, especially older slab-on-grade construction in areas like El Cajon or La Mesa, a slab leak under the floor can be tricky to isolate. The restoration crew coordinates with the plumber so mitigation work can begin as soon as the source is confirmed off.
Once the water is stopped, techs assess structural safety. Saturated drywall is heavy. Ceilings that have held standing water can buckle. Wet flooring can be slippery and unstable. The crew walks the space systematically before moving equipment in.
Electrical hazards get checked before anyone sets up gear. If water has reached a panel, outlet, or subfloor where wiring runs, power to that zone gets shut off until an electrician clears it. This isn’t caution theater. Water and live circuits are a serious combination, and restoration crews are not electricians. If there’s any question, the power goes off first.
Step three: inspection and moisture mapping
This step gets skipped in cheap or rushed jobs, and it’s the reason problems come back months later.
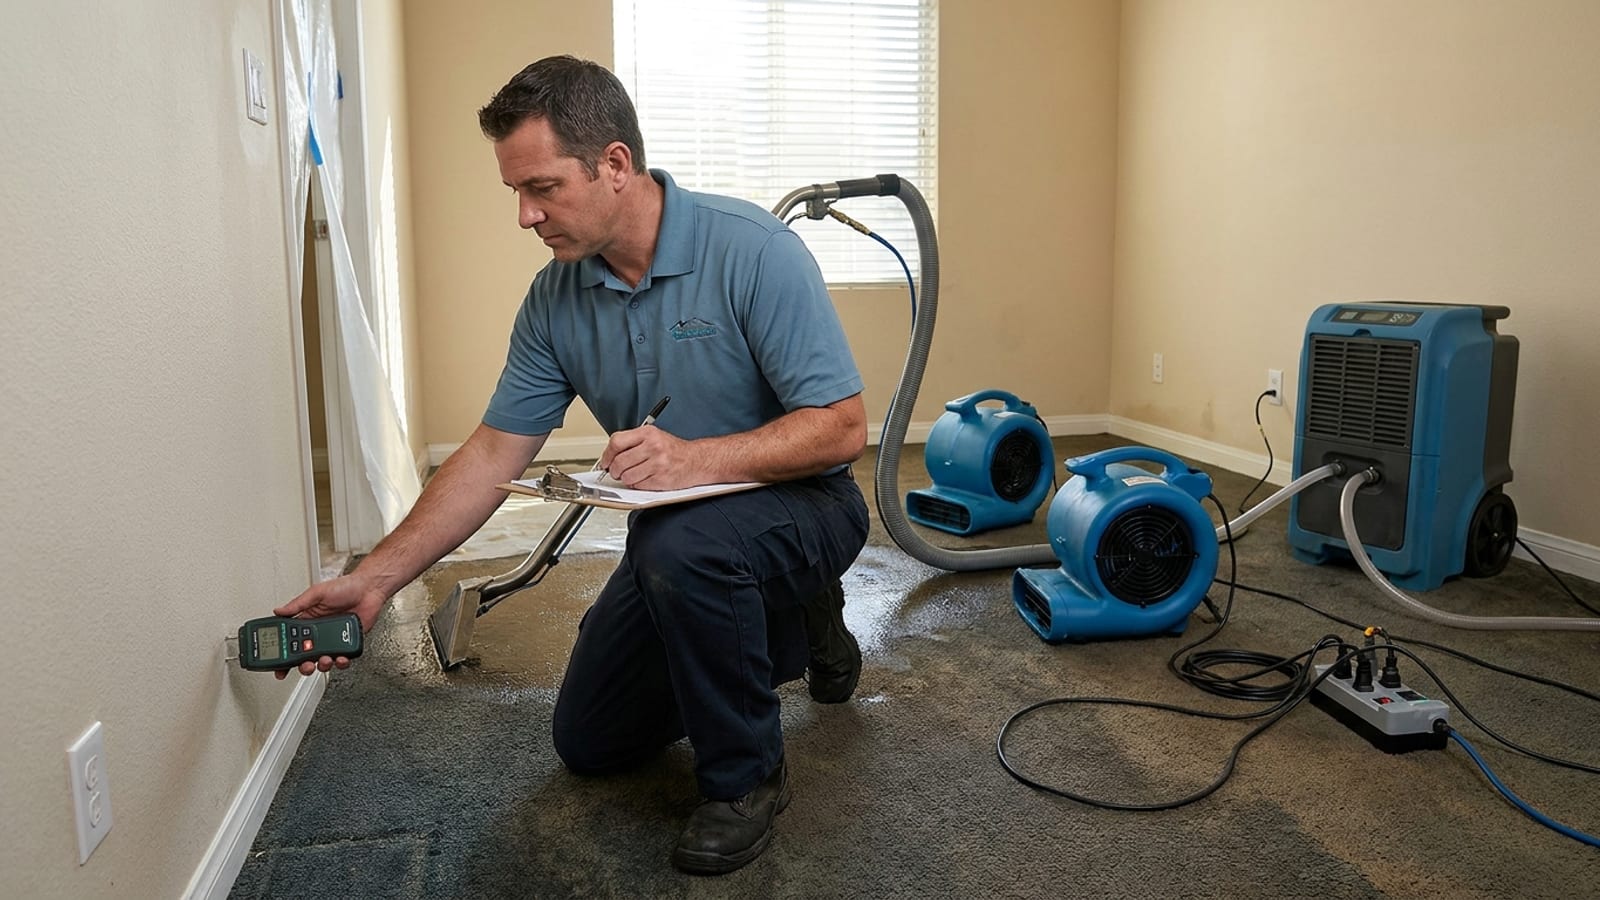
Using thermal imaging cameras and calibrated moisture meters, technicians map every affected surface: walls, floors, subfloor, ceiling, cabinets, and structural framing. Water doesn’t travel in straight lines. In a two-story home in Encinitas, a second-floor bathroom leak can follow the framing and show up in a wall cavity on the first floor thirty feet away. Marine-layer humidity can make ambient readings misleading if a tech doesn’t account for baseline conditions.
The moisture map becomes the benchmark. It tells the crew exactly where drying equipment needs to go, and it gives you and your insurance adjuster a documented picture of the damage scope before anything is touched.
Step four: water extraction
Once the scope is mapped, extraction begins. Commercial-grade truck-mount extractors and portable units pull standing water out fast. The faster the water is out, the less it migrates into materials that aren’t yet saturated. On carpet and pad, powerful extraction can sometimes salvage the carpet itself if it’s done within the first few hours, though the pad almost always comes out regardless because it holds water longer than it appears to.
For hardwood floors common in older Chula Vista and Coronado homes, this timing matters even more. Wood swells quickly and can cup or buckle within 24 hours. Getting the water off the surface fast doesn’t guarantee the floor survives, but it gives it the best chance.
Step five: removing unsalvageable materials
Not everything can be dried in place. Saturated drywall, compromised insulation, and soaked carpet pad absorb and hold water in ways that industrial drying equipment can’t fully overcome on a realistic timeline. Leaving them in place creates a moisture reservoir that feeds secondary damage, including mold, which can begin colonizing within 24 to 48 hours in warm conditions.
This is often the part homeowners find most alarming: watching techs cut out sections of wall or pull up flooring. But controlled demolition here is far less costly than discovering mold behind intact walls six weeks later. Techs mark exactly what comes out, document it with photos, and bag materials for disposal according to the water category. All of this goes into the claim documentation.
The good news is that the cuts are typically made at standard heights (like 2 feet or 4 feet) to align with drywall sheets, making the rebuild phase cleaner.
Step six: structural drying
This is where structural drying becomes the core of the job. Air movers and commercial dehumidifiers run continuously, often for three to five days or longer depending on the material types, depth of saturation, and conditions in the space.
Air movers accelerate evaporation off wet surfaces. Dehumidifiers pull that evaporated moisture out of the air before it settles back into walls and framing. The two work together as a system. Placement matters: techs calculate the number and position of units based on the square footage of affected area, the types of materials being dried, and the ambient temperature and humidity readings in the space.
The IICRC S500 is the industry standard that reputable restoration companies follow for this process. It defines drying goals by material class and outlines the equipment ratios and monitoring protocols that separate a proper dry from one that just feels dry on the surface.
During this phase, the crew also applies antimicrobial treatments to surfaces that are at risk of mold growth, particularly in areas where Category 2 or 3 water was present.
Step seven: daily moisture monitoring
Drying equipment running is not the same as drying done. Techs return daily to log moisture readings at every marked location from the original moisture map. They’re tracking whether the numbers are dropping, and whether they’re dropping consistently across all materials.
This step protects you. It creates a paper trail that shows the drying progression was monitored and managed, not just left to equipment running unsupervised. If readings stall or a pocket of moisture isn’t responding, equipment gets repositioned or upgraded. The job isn’t closed until readings return to dry standard across every documented point.
This is also one of the main reasons water damage restoration takes longer than most homeowners expect. You can’t rush evaporation. Trying to shortcut the drying phase is one of the most common causes of mold problems appearing after a restoration that seemed finished.
For a realistic sense of the full timeline, including what affects it in San Diego specifically, see how long restoration takes.
Step eight: cleaning and antimicrobial treatment
Once materials reach dry standard, the space gets a thorough cleaning. Surfaces are wiped down, air scrubbers may run to clear any particulate from the demolition phase, and antimicrobial or antifungal agents are applied to framing and other surfaces that will be enclosed in the rebuild.
For Category 2 or 3 water intrusions, this step is more extensive. Affected surfaces need proper treatment before any reconstruction can happen. Skipping or rushing this phase is how post-restoration mold problems start.
In San Diego County, the combination of warm temperatures and marine-layer humidity creates favorable conditions for mold year-round. A space that was dried properly and treated correctly before closing up is dramatically less likely to develop a mold issue later. A space that was closed up with residual moisture or skipped antimicrobial treatment is a waiting problem. Technicians document what was applied, where, and when, so there’s a record if questions come up later during repairs or a home sale.
Step nine: reconstruction and repairs
Restoration ends when your home is back to its pre-loss condition, not just dried out. That means replacing drywall, reinstalling baseboards, repainting, patching flooring, and whatever else was removed during mitigation. Some companies handle reconstruction in-house. Others hand that phase off to a contractor they work with.
Either way, get clarity on this before the job starts. Know who’s doing the rebuild, whether they’re included in the estimate or billed separately, and what the timeline looks like. Insurance adjusters review the scope of reconstruction separately from mitigation, so it helps to have that documented cleanly from the start.
One thing that catches homeowners off guard: the reconstruction estimate is often written after mitigation is complete, not before. The reason is that the full scope of damage isn’t always visible until materials are removed. A wall that looked fine on the surface sometimes reveals rotted framing or a compromised subfloor beneath. That’s not a bait-and-switch; it’s the honest reality of water damage that’s been hidden inside a structure. A good restoration company explains this upfront so you’re not blindsided when the rebuild scope comes in.
When to call a professional
If you’ve got more than a small contained puddle, call a restoration company before you decide it’s manageable yourself. Standing water that’s been in contact with walls, flooring, or a subfloor for more than a few hours is already working into materials you can’t see. By the time visible mold or odor shows up, the problem is significantly larger than it would have been at hour two.
The process above is thorough because water damage is thorough. A crew that cuts corners on moisture mapping, skips daily monitoring, or rushes the drying phase will leave you with a problem that shows up later, when the job is closed and the equipment is gone.
Call us at (858) 925-5546 for a same-day estimate.